How to Disable IPv6 in Windows 8
IPv6 is the next generation internet protocol, but by default it is enabled in Windows, but sometimes it can cause problems with legacy equipment and DNS in certain environments. Now you may think disabling it is as easy as removing the tick, well you would think so, but things are not that simple when it comes to disabling IPv6.
Now if you’re having network issues with IPv6 enabled, try disabling IPv6 with it disabled it can fix a lot network issues you may be having on your Windows computer.
Now you only need to disable IPv6 if your experiencing network issues with your Windows machine so there’s no reason to disable IPv6 unless you’re having issue.
So how can we disable IPv6? we can easily disable IPv6 by editing the Windows registry.
You can check out my small video on how to disable IPv6
This method works with Windows 7 and Windows 8 and 8.1
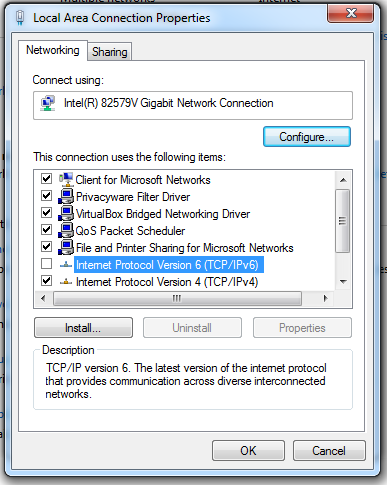
Press “Start Button” then “Control Panel” then “Network and Sharing Center” then “Local Area Connection” then “Properties”
Then remove tick from “Internet Protocol Version 6”
Press “Start Button” then “Run” type “regedit”

Next you need to navigate to:
<h5itemprop=”name”>\HKEY_LOCAL_MACHINE\SYSTEM\CurrentControlSet\Services\TCPIP6\Parameters
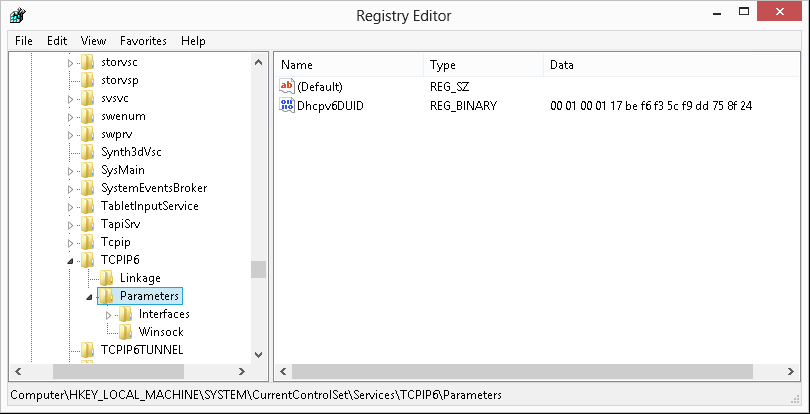
Right click on “Parameters“, “New“, and select “DWORD (32-bit) Value”
Name it “DisabledComponents”
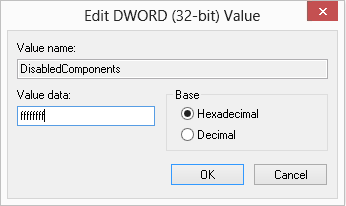
Double click on “DisabledComponents” value, enter ffffffff into the Value data dialog box, and click “OK”
Job done. Restart you’re computer, and you’re IPv6 will be disabled