Setup Personal Cloud Storage with Owncloud on Ubuntu 18.04 LTS
If you are looking at setting up your own personal cloud storage using owncloud on Ubuntu 18 LTS then this video is for you.
I will show you how you step by step on setting up your own persona cloud storage on a Mini PC.
Step 1: Install Apache2 HTTP Server
First we need to install webserver Apache2 on Ubuntu by entering commands below:
sudo apt install apache2
Once we installed Apache2, run the next command below, this will disable directory listing.
sudo sed -i "s/Options Indexes FollowSymLinks/Options FollowSymLinks/" /etc/apache2/apache2.conf
These Apache2, commands below will be used to stop, start and enable Apache2 service.
sudo systemctl stop apache2.service
sudo systemctl start apache2.service
sudo systemctl enable apache2.service
Step 2: Install MariaDB Server
OwnCloud will need a database server, so we will use MariaDB database server. Enter commands below.
sudo apt-get install mariadb-server mariadb-client
These MariaDB commands below will be used to stop, start and enable MariaDB service.
sudo systemctl stop mariadb.service
sudo systemctl start mariadb.service
sudo systemctl enable mariadb.service
Now we need to secure MariaDB server with command below.
sudo mysql_secure_installation
Next we need to answer the questions below.
- Enter current password for root (enter for none): Just press the Enter
- Set root password? [Y / n]: Y
- New password: Enter password
- Re-enter new password: Repeat password
- Remove anonymous users? [Y / n]: Y
- Disallow root login remotely? [Y / n]: Y
- Remove test database and access to it? [Y / n]: Y
- Reload privilege tables now? [Y / n]: Y
Restart MariaDB server
sudo systemctl restart mariadb.service
Step 3: Install PHP And Related Modules
Next we need to enter commands below to add the third party repository to upgrade to PHP 7.1
sudo apt-get install software-properties-common
sudo add-apt-repository ppa: ondrej/php
Now just update and upgrade to PHP 7.1
sudo apt update
sudo apt upgrade
Now we can finally install PHP 7.1 and related modules by entering commands below.
sudo apt install php7.1 libapache2-mod-php7.1 php7.1-common php7.1-mbstring php7.1-xmlrpc php7.1-soap php7.1-apcu php7.1-smbclient php7.1-ldap php7.1-redis php7.1-gd php7.1-xml php7.1-intl php7.1-json php7.1-imagick php7.1-mysql php7.1-cli php7.1-mcrypt php7.1-ldap php7.1-zip php7.1-curl
Now that we just installed PHP, run the commands below to open FPM PHP default file.
sudo nano /etc/php/7.1/apache2/php.ini
Now you can make the following changes below in the file and save.
 file_uploads = On
 allow_url_fopen = On
 memory_limit = 256M
 upload_max_filesize = 100M
 display_errors = Off
 date.timezone = England / London
Step 4: Create OwnCloud Database
We have now installed all the packages that are required, now create a blank OwnCloud database.
To connect to MariaDB server, run the commands below.
sudo mysql -u root -p
Now create a database called owncloud
CREATE DATABASE owncloud;
Create a database user called ownclouduser with new password
CREATE USER 'ownclouduser'@'localhost' IDENTIFIED BY 'password_here';
Then grant the user full access to the database.
GRANT ALL ON owncloud.* TO 'ownclouduser'@'localhost' IDENTIFIED BY 'password_here' WITH GRANT OPTION;
Finally, save your changes and exit.
FLUSH PRIVILEGES;
EXIT;
Step 5: Download OwnCloud Latest Release
Next we can download and and extract OwnCloud files into its root directory:
cd /tmp && wget https://download.owncloud.org/community/owncloud-10.0.8.zip

unzip owncloud-10.0.8.zip

sudo mv owncloud /var/www/html/owncloud/
We need to set the correct permissions for OwnCloud to function correctly so run following commands.
sudo chown -R www-data:www-data /var/www/html/owncloud/

sudo chmod -R 755 /var/www/html/owncloud/
Step 6: Configure Apache2
We can now configure Apahce2 site configuration file for OwnCloud.
sudo nano /etc/apache2/sites-available/owncloud.conf
Now copy and paste the text below into the file and save it. Edit with your own domain name and directory root location.
<VirtualHost *:80>
ServerAdmin admin@briteccomputers.co.uk
DocumentRoot /var/www/html/owncloud/
ServerName briteccomputers.co.uk
ServerAlias briteccomputers.co.uk
Alias /owncloud “/var/www/html/owncloud/”
<Directory /var/www/html/owncloud/>
Options +FollowSymlinks
AllowOverride All
Require all granted
<IfModule mod_dav.c>
Dav off
</IfModule>
SetEnv HOME /var/www/html/owncloud
SetEnv HTTP_HOME /var/www/html/owncloud
</Directory>
ErrorLog ${APACHE_LOG_DIR}/error.log
CustomLog ${APACHE_LOG_DIR}/access.log combined
</VirtualHost>
Save the file and exit.
Step 7: Enable The OwnCloud And Rewrite Module
Onced you configured VirtualHost above, we need to enable it by running the commands below
sudo a2ensite owncloud.conf
sudo a2enmod rewrite
sudo a2enmod headers
sudo a2enmod env
sudo a2enmod dir
sudo a2enmod mime
Step 8: Restart Apache2
Now to load all the settings above, just restart Apache2 by running the command below.
sudo systemctl restart apache2.service
Step 9.: Access Owncloud from the LAN
Now we can try and access OwnCloud from inside our home network, you will need to know your IP address of the owncloud server .
1. Open a new terminal and enter the following command:
ifconfig
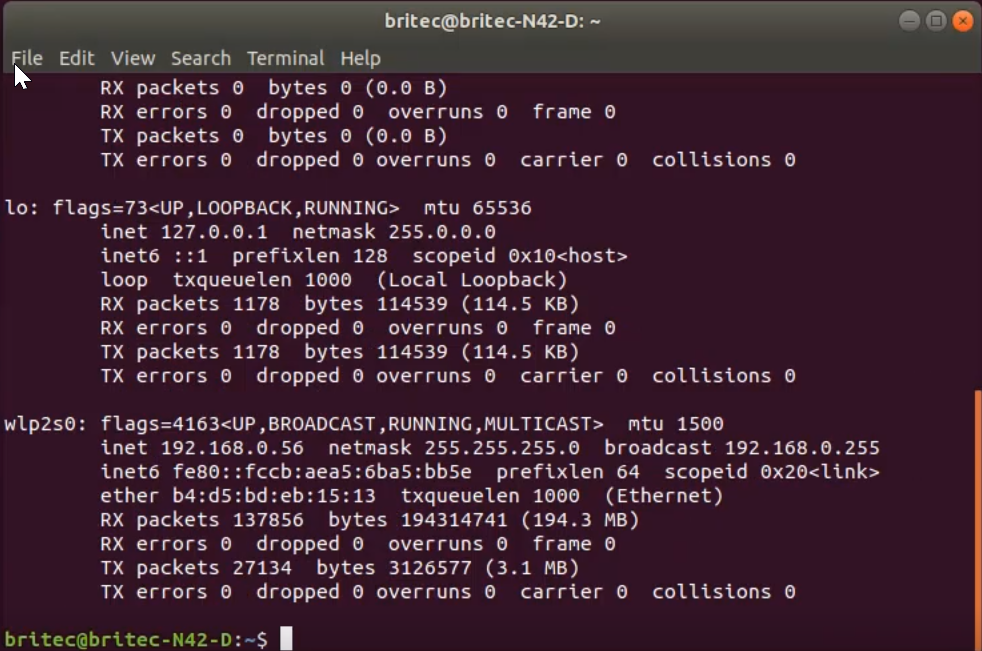
2. Locate the IP address of the Ubuntu server, it should look something like: 127.x.x.x or 10.x.x.x
3. Place your LAN IP in the address bar like this: https://127.0.0.1/owncloud/index.php
Now we can open a web browser and type server domain name. You should see OwnCloud setup wizard to complete. Please follow the wizard carefully.
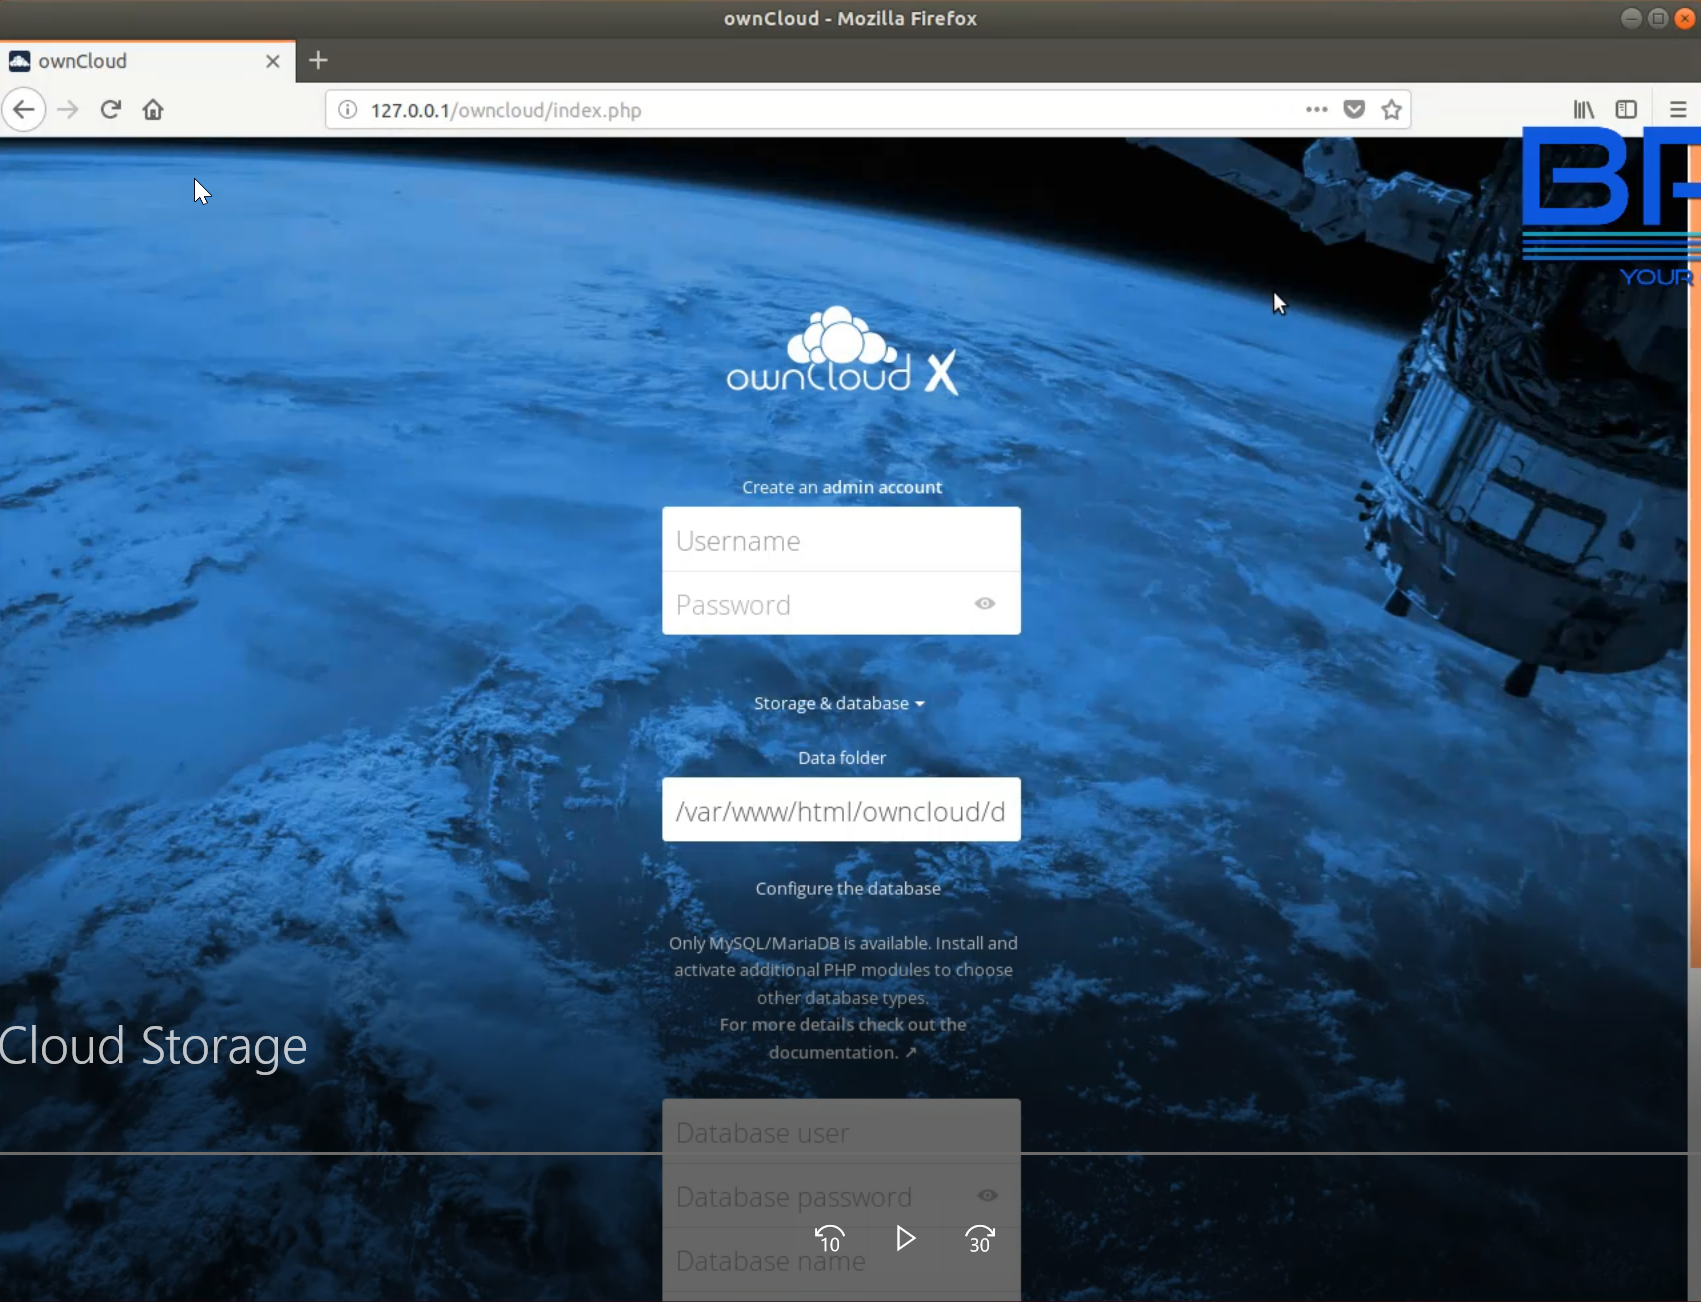
4. You should then see OwnCloud setup page. Sign in with your created admin account and password. Connect to the database using the information you created and continue.
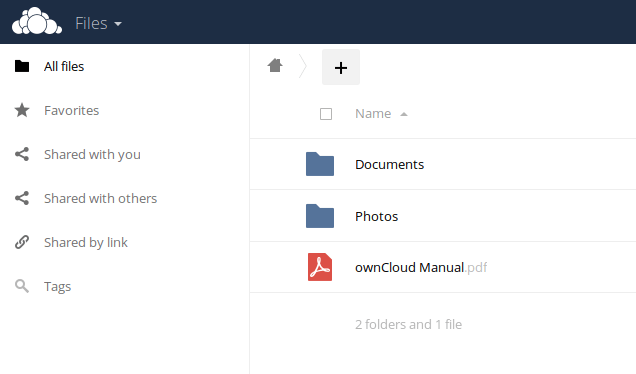
5. You should now be able to log in to your account and start using OwnCloud
To get Access to your Owncloud server from outside your home network, you will need to do more steps, this will be in a up and coming video.