Optimize Your DNS Server For Faster Internet: Changing your DNS server can help with if your suffering from slow internet performance, I am with Virgin Media and some times there DNS goes down or its causes slow internet browsing.
So in this guide I will show you how to optimize your Internet browsing experience, by changing your DNS Server
First we will need to download a free program called DNS Benchmark, its great at helping us speed up our internet by telling us which DNS servers are fastest, please download DNS Benchmark HERE.
1. Click on DNSBenchmark.exe file 
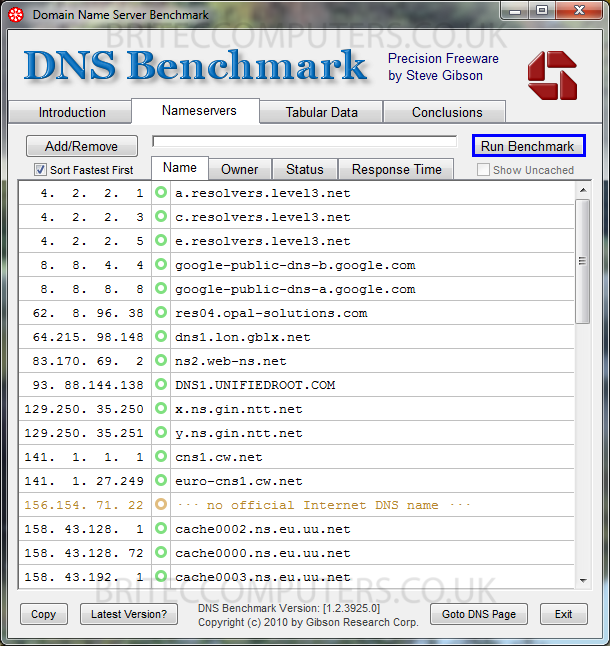
2. Click tab marked “Nameservers” then tab marked “Name”
- The green & white circles are functioning DNS servers.
- The Pink circles are dead DNS servers.
- The Brown circles are redirectors.
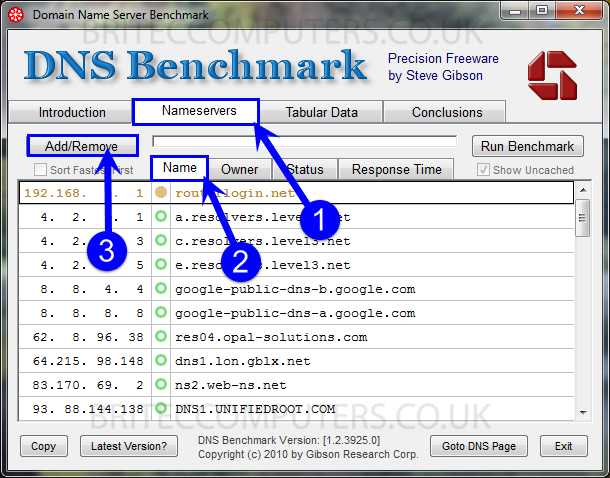
3. Click the “Add/Remove tab. deselect “Remove 39 dead nameservers” and “Remove redirecting servers”
(we don’t need any “Dead” or “Redirection” DNS servers)
Note: your list for dead servers may differ from mine.

4. Now we are ready to run our DNS Benchmark, click Run Benchmark
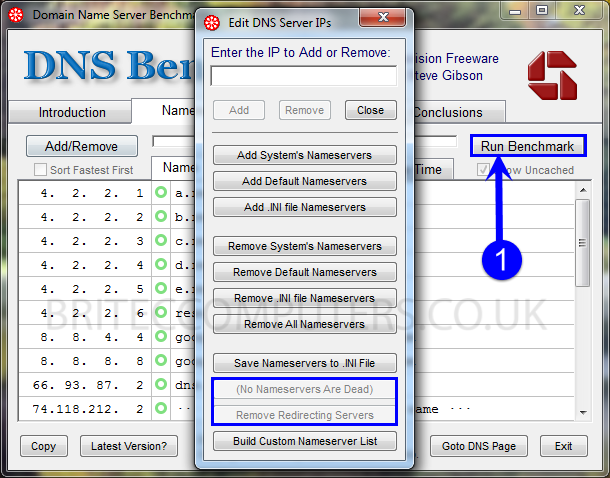
5. DNS Benchmark with start it scan.
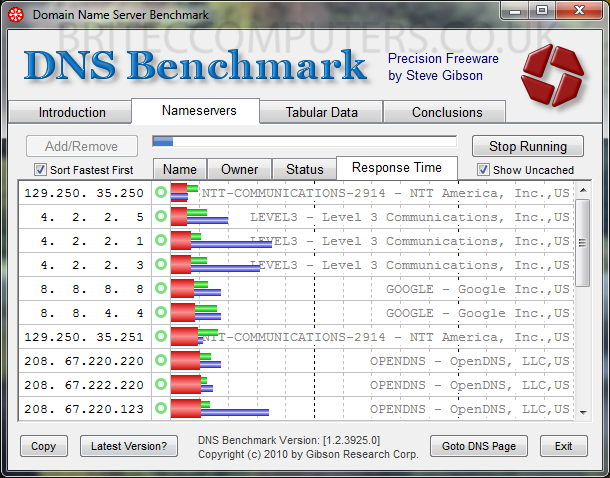
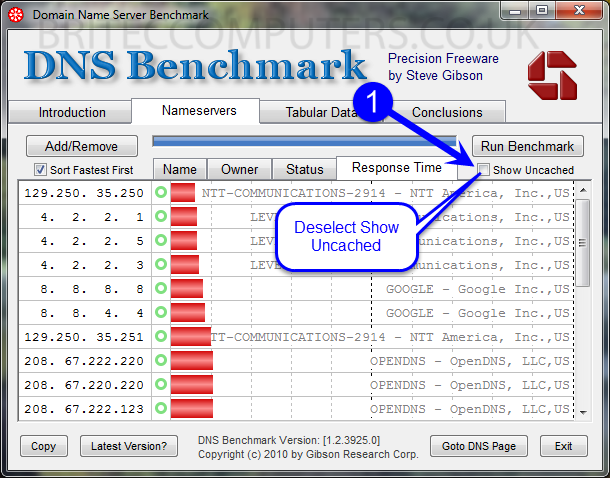
6. Once scan is complete, deselect the “Show Uncached” we have now completed the default in built DNS servers.
7. Once DNS benchmark has finished its scan a dialogue box will pop up asking if you want to run a “Custom Nameserver list“.
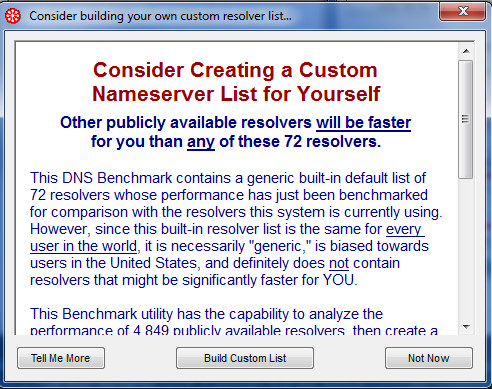
8. Click on Build Custom List, it will take 40 minutes which will pick the fastest 50 servers out of thousands of DNS servers that it checks.
9. Now Press Run Benchmark
10. It will now start to scan, be patient, it will take some time.
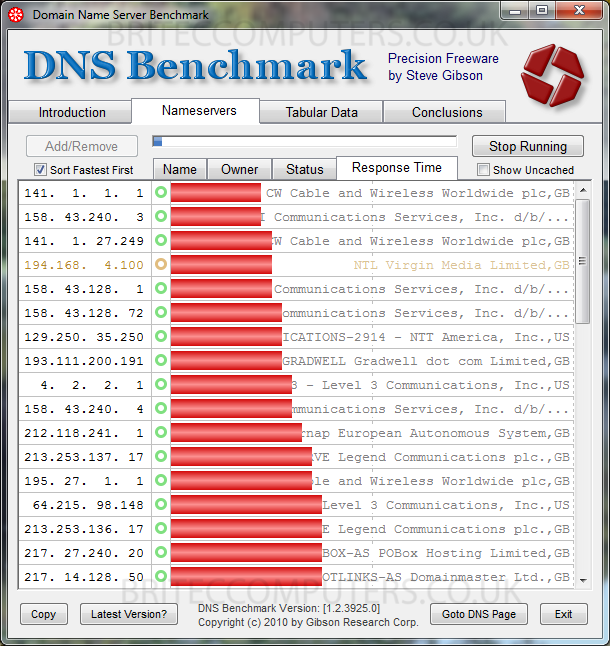
11. You should now see your custom DNS Server list. You can remove any of these by right clicking on the server you wish to remove.
- You should see your fastest listed. (example below)
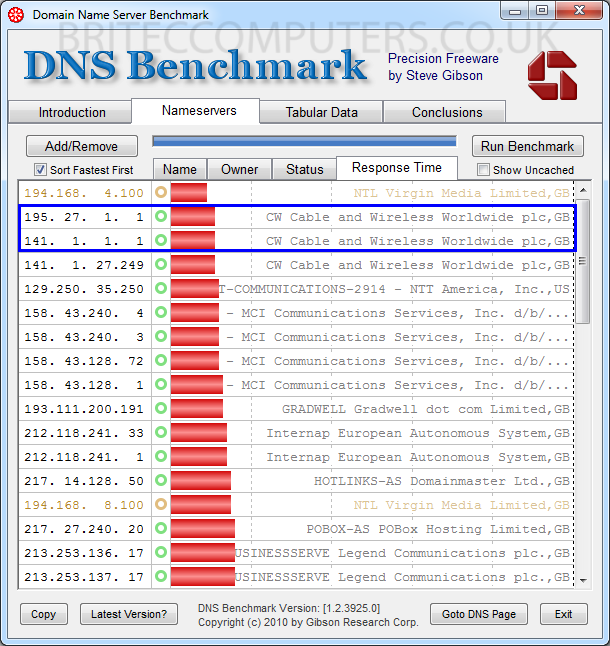
12. Copy the two fastest DNS Servers, and then put those addresses into your TCP/IP configuration
1. Go to Windows Start button, in the Search box. Type ncpa.cpl then press Enter.
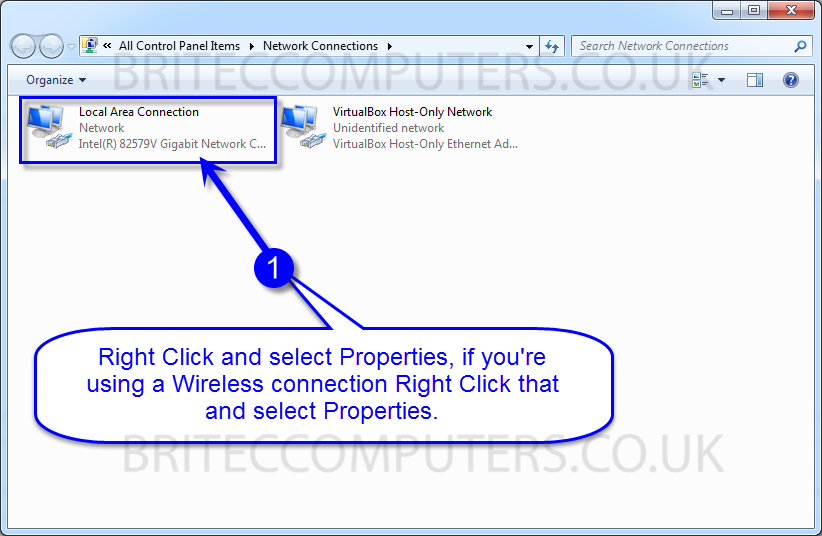
2. Right click your connection, and select properties.

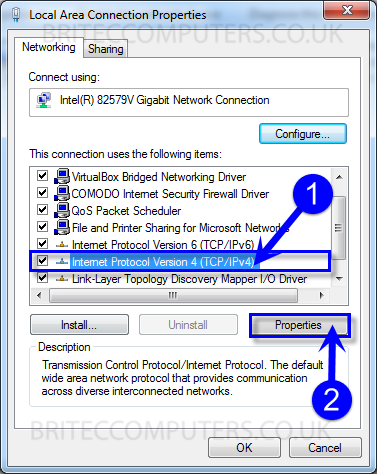
3. Now select Internet Protocol Version 4 (TCP/IPv4) Then select Properties.
4. Select “use the following DNS server address” radio button
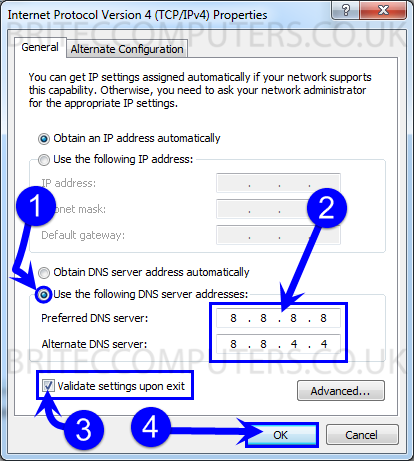
Now type the Primary DNS number you have chosen, then Alternate number for that DNS server , as shown above. Press Enter then OK button.
5. We now need to flush the DNS Cache which will also Register your new DNS server.
- Open Elevated Command Prompt.
- Click Start
- All Programs
- Accessories
- Right-click Command Prompt
- Click Run as administrator.
- Now type Ipconfig /flushdns, press Enter.
- Now type Ipconfig /registerdns then press Enter
That’s it. You have just change your DNS to a faster DNS server for faster internet browsing.


Hi,
I got confused O-o Because you put two fastest DNS Servers that they are not
listed in the (Example) screenshot! may u help me how can I get the Preferred
DNS & Alternate DNS from the latest benchmark please ?
Here is my biggest problems ):
1: How can I update Flash Player for IE, manually ?
2: How to fix this problem in a best and efficient way please ?
Note: But don’t tell me Reset IE settings OR disable/enable ActiveX Filtering!
allow webpage wants to run the following add-on adobe flash player from microsoft windows third party application component
Warmest Regards
Please post on my forum for help and support.